Showing posts with label Stamping. Show all posts

Saturday, November 6, 2010

A Birthday Sort of Day

Good morning blog readers! Today is a pretty special day around here....it's my birthday!  :)  Which in my books, makes it a fantabulous day no matter what is going on. 

Granted, it is also make and take weekend at Archivers, so I will be spending most of my day at work helping people make Chistmas cards but at least I get to play with scrappy products all day.  Then later on I will be sharing an extra special birthday dinner with my family which should be really great. :)

I also got my very first birthday card for this year, and guess what? I made it. My church sent me one of my  very own creations to wish me a happy birthday.  :) This is the card I recieved in the mail...


Does it look familiar...its because I posted it last month. He-he....my family and I really got a kick out of this one.

So in honor of my birthday, I thought I would share my birthday cards that I made for November. I was able to play with some really cool techniques on these and I absolutely LOVE how they turned out. :)


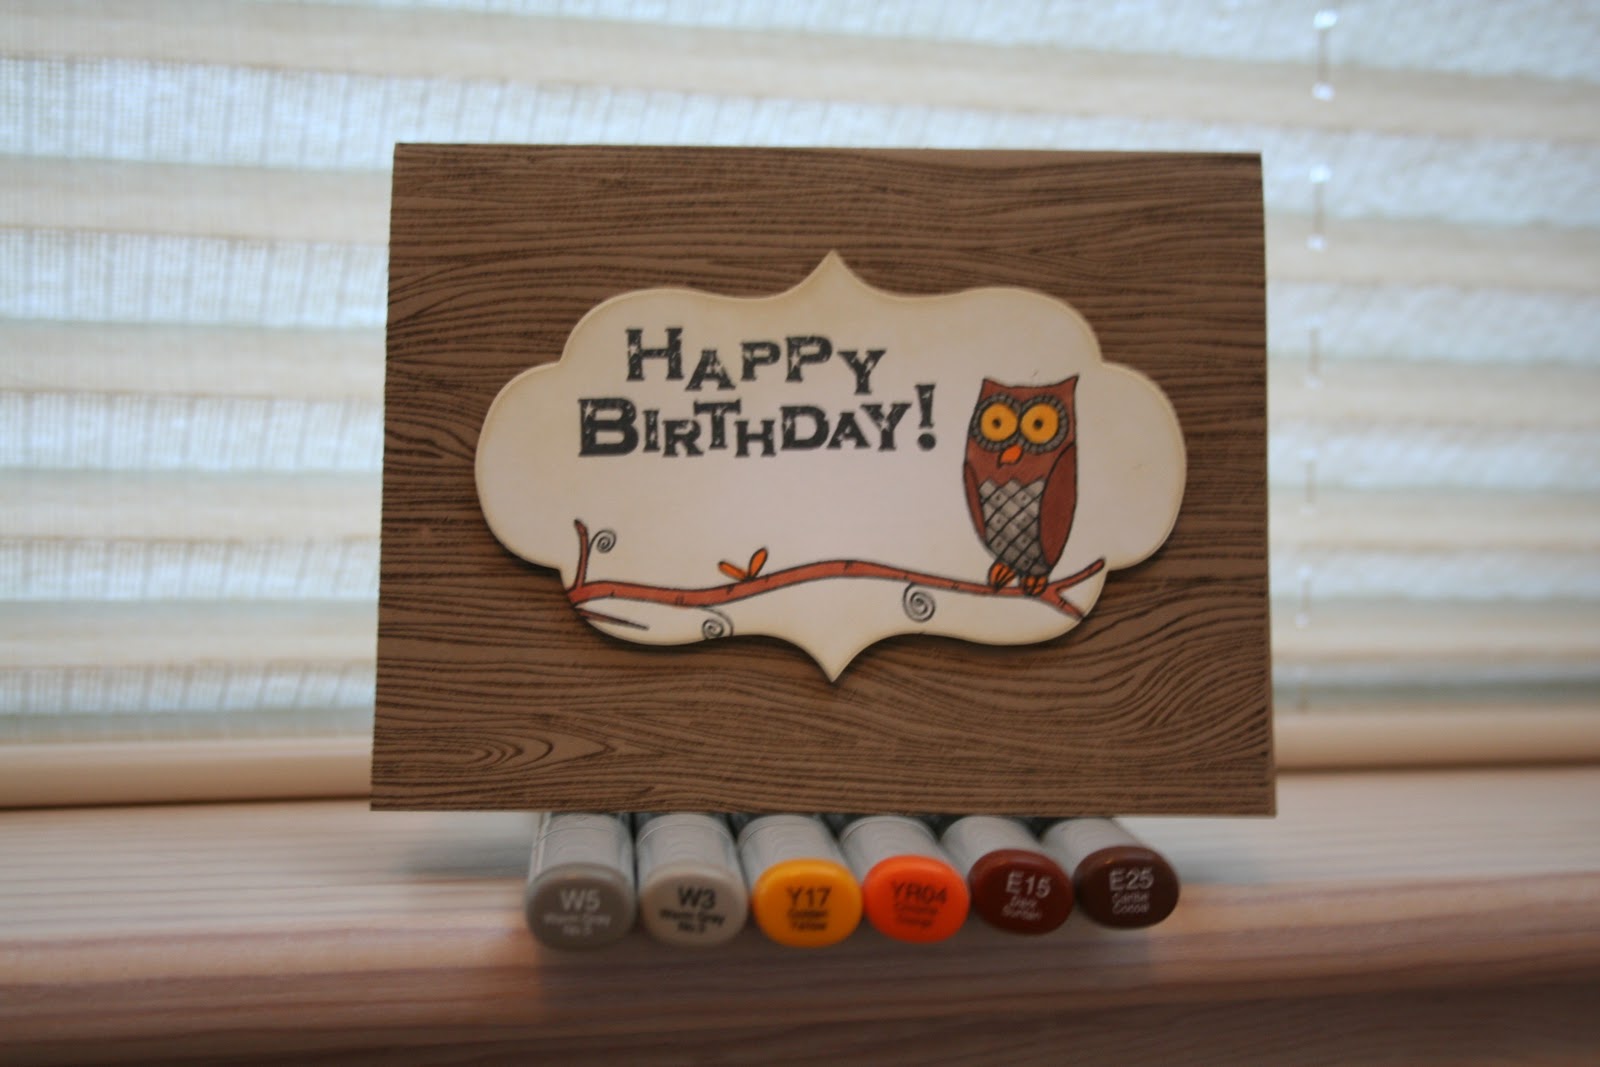
For this fabulous card, I was able to play with several techniques. I first diecut the label shape from one of the Tim Holtz Alterations dies. I then stamped the branch and cute little owl from Hero Arts onto the label with Memento ink. I also found this great sentiment from Scrappy Cat with little stars in the letters to add to the project. I then colored my card with Copic markers. It turned out really well and the coloring went pretty quicky considering that I colored 40 of these babies. :)  I then distressed the edges with Tim Holtz Antique Linen Distress ink and my ink blending tool.  Finally I stamped this woodgrain stamp from Hero Arts with Walnut Stain Distress ink and pop-dotted the label piece to the card. Definately a card that both guys and girls will love. :)


This next card uses one of my favorite ever Hero Arts stamps...Silhouette Grass. My coworkers think I am crazy for loving this stamp so much but I see *tons* of possibilities here. 

The inspiration for this card came from an SEI paper pack called Charlemagne. The copper and tan combo, highlighted with the turquoise and black accents really struck me as a beautiful autumn color combination and I thought it would translate beautifully into this card.

First I diecut my white cardstock with another one of my favorite Tim Holtz Alterations dies and then I stamped the Silhouette Grass stamp with Versamark and embossed it using copper embossing powder.  I then used Tim Holtz Antique Linen Distress ink and my ink blending tool to color the edges of my image. I stamped one of my favorite birthday sayings from Hero Arts on turquoise cardstock and cut the ends to create the banner shape and pop-dotted this to my card. I still felt that it needed a bit more so I added 3 turquoise gemstones in a cluster to the front to finish my project.  It really was a fairly simple card design and I was able to create 40 of these in just one evening. :)

Well that's it for this post. Hope you enjoyed the cards and have a wonderful day everyone!

Until next time,

Janeen :)


Tuesday, November 2, 2010

Distress Ink Goodness

Hey there my fabulous blog readers. Here we are on day 2 of my 30 days of blog posts.  Today I want to share some links and goodness about my one of my absolute favorite scrapping/card making products - Distress Inks!!! :) 


Ahhh, inky goodness! And it comes in 36 yummy colors.

And my favorite tool to use with Distress Inks?  The Tim Holtz Ink Blending Tool.


Now, make sure you get the one with FOAM pads, not felt. This lil' baby is fabulous for adding a lighter blended layer of ink to your projects and it is a must have for Distress Inks.

I store my foam pads in little baggies and label each one with the name of the color of Distress ink that I used with it so that I can re-use them. :)

And these are a few of my favorite places to get information and video tutorials for Distress Inks. Check 'em out to learn all sorts of fabulous techniques with them.

 Jennifer does AMAZING things with inks and stamps. This is her blog and she often has videos using lots of products and techniqes. To find all her videos, simply go to the link at the top of her blog that says "how-to videos".

http://www.twopeasinabucket.com/mb.asp?cmd=display&forum_id=52&thread_id=2839474
 A series of videos Jennifer did for 2Peas using lots of Ranger and Hero Arts. There are a ton of videos on all sorts of products but the Distress ink ones are my faves. :)

https://www.twopeasinabucket.com/events/7-october-stamping-month-at-two-peas/
A brand new, holiday verison of Thinking Inking with tons of fabulous techniques and ideas.

So give these fabulous inks a try and use them on your next crafty project.

Until next time,
Janeen :)


Monday, May 10, 2010

A bit of Craftiness.... :)

Hello bloggers...again life has taken over and I have't blogged in forever. So to make up for my absence, I have lots of fun crafty stuff to post. :)

First up is a layout I made today. I tried a fun new technique...which I will share below.


Isn't it just super cute? I just totally love these pictures of Bailey when she was a puppy. Her favorite toy was her squeaky balls and I love these photos of her playing with them. And speaking of playing, I played with some of the papers from the April's Scarlet Lime kit....which is gorgeous by the way. Lots of bright primary colors paired with elegant black papers. I only used yellow pieces for this layout, but there are a ton of blues and reds too...Another layout is in the works with the kit so stay tuned. :)

The technique I want to share with you today is the black accents with the text type paper behind it. Believe it or not, this is all stamping! Except for the largest element on the layout which is a clear sticker from Heidi Swapp. I found a roll of 100 of these stickers at Tuesday Morning for $1.99 so you will probably be seeing A LOT of these on my upcoming projects. :)

So want to know how to get this super fun look? I simply used a few basic stamping supplies and 2 of my favorite stamps from Hero Arts:


Hero Arts Cling Stamp: Friend Definition                       Hero Arts Clear Stamp: Speckled Ornaments


1. Stamp the friend definition onto plain white cardstock using a black chalk or shadow ink. This gives the background the look of newsprint. I used the mini stamp press from Fiskars to mount my stamp on. I find that it gives me more control over where I place my stamp and also helps give me a more crisp image.


2. Adhere your cling stamp to an acryllic mount and stamp it on top of the image you stamped in step 1 with Versamark Ink or other favorite clear embossing ink. Sprinkle on black embossing powder and heat your image with a heat gun.


3. Cut out around the stamped image leaving about a 1/4 inch border around the image.


4. Use your favorite adhesive or pop-dots to attach your embellishment to your project.

I ended up using these flourish images on a set of cards that I made to have on hand.


________________________________________________________________________________

I also thought I would share a few of my other recent projects that I have been working on. Enjoy!


This layout was super fun and easy to put together. I followed a sketch out of a recent issue of Creating Keepsakes, altering the colors and elements to match my photos.  These photos are from a fun evening that my friends and I shared back in 2007. We had a bonfire and a hayride, which had a haunted stop along the way with a little church and a "ghost". It was a really good joke and we all still talk about that memorable adventure.


This is another sweet layout of my puppy Bailey out in the snow.  She loves to be outside in the white fluffy stuff and always ends up covered from head to tail in snow.  I had a lot of fun playing with these papers from American Crafts and adding some bling snowflakes from Basic Grey to add that special touch to the layout.


This layout was created for this month's design team challenge over at the If It's Groovy Blog. We were asked to get creative with shadows in our photographs and so I snapped this sweet photo of my parent's shadows on our driveway as they embraced. :) I was able to use up a small bit of my Valentine's paper stash by using these fun papers by Chatterbox and Carolee's Creations. The scalloped border is created with Paper Frills from Doodlebug and I used Prima roses to give my layout that special touch.